Learn how to place a widget manually on-site.
Aside from the automatic drag and drop widget insertion method, PickyStory also has a manual way of inserting a widget on-site, and here's how you can do it.
1. Get the class or id
First, locate the class or id of your desired location.
To do this, you need to right-click on the page and then select 'inspect'.
Then, hover your cursor to your desired location.

Make sure that the class or id you chose exists only one time on the page by clicking on 'ctr+f' and searching the selected selector: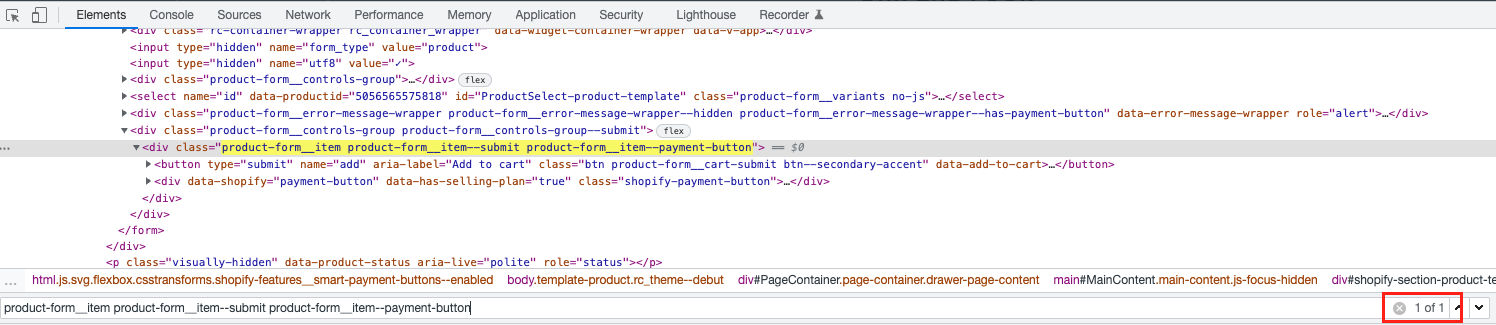
Note: Widgets are automatically placed after the chosen selector. In this case, the screenshot above indicates that the widget will be placed "after" the End of Season Sale header.
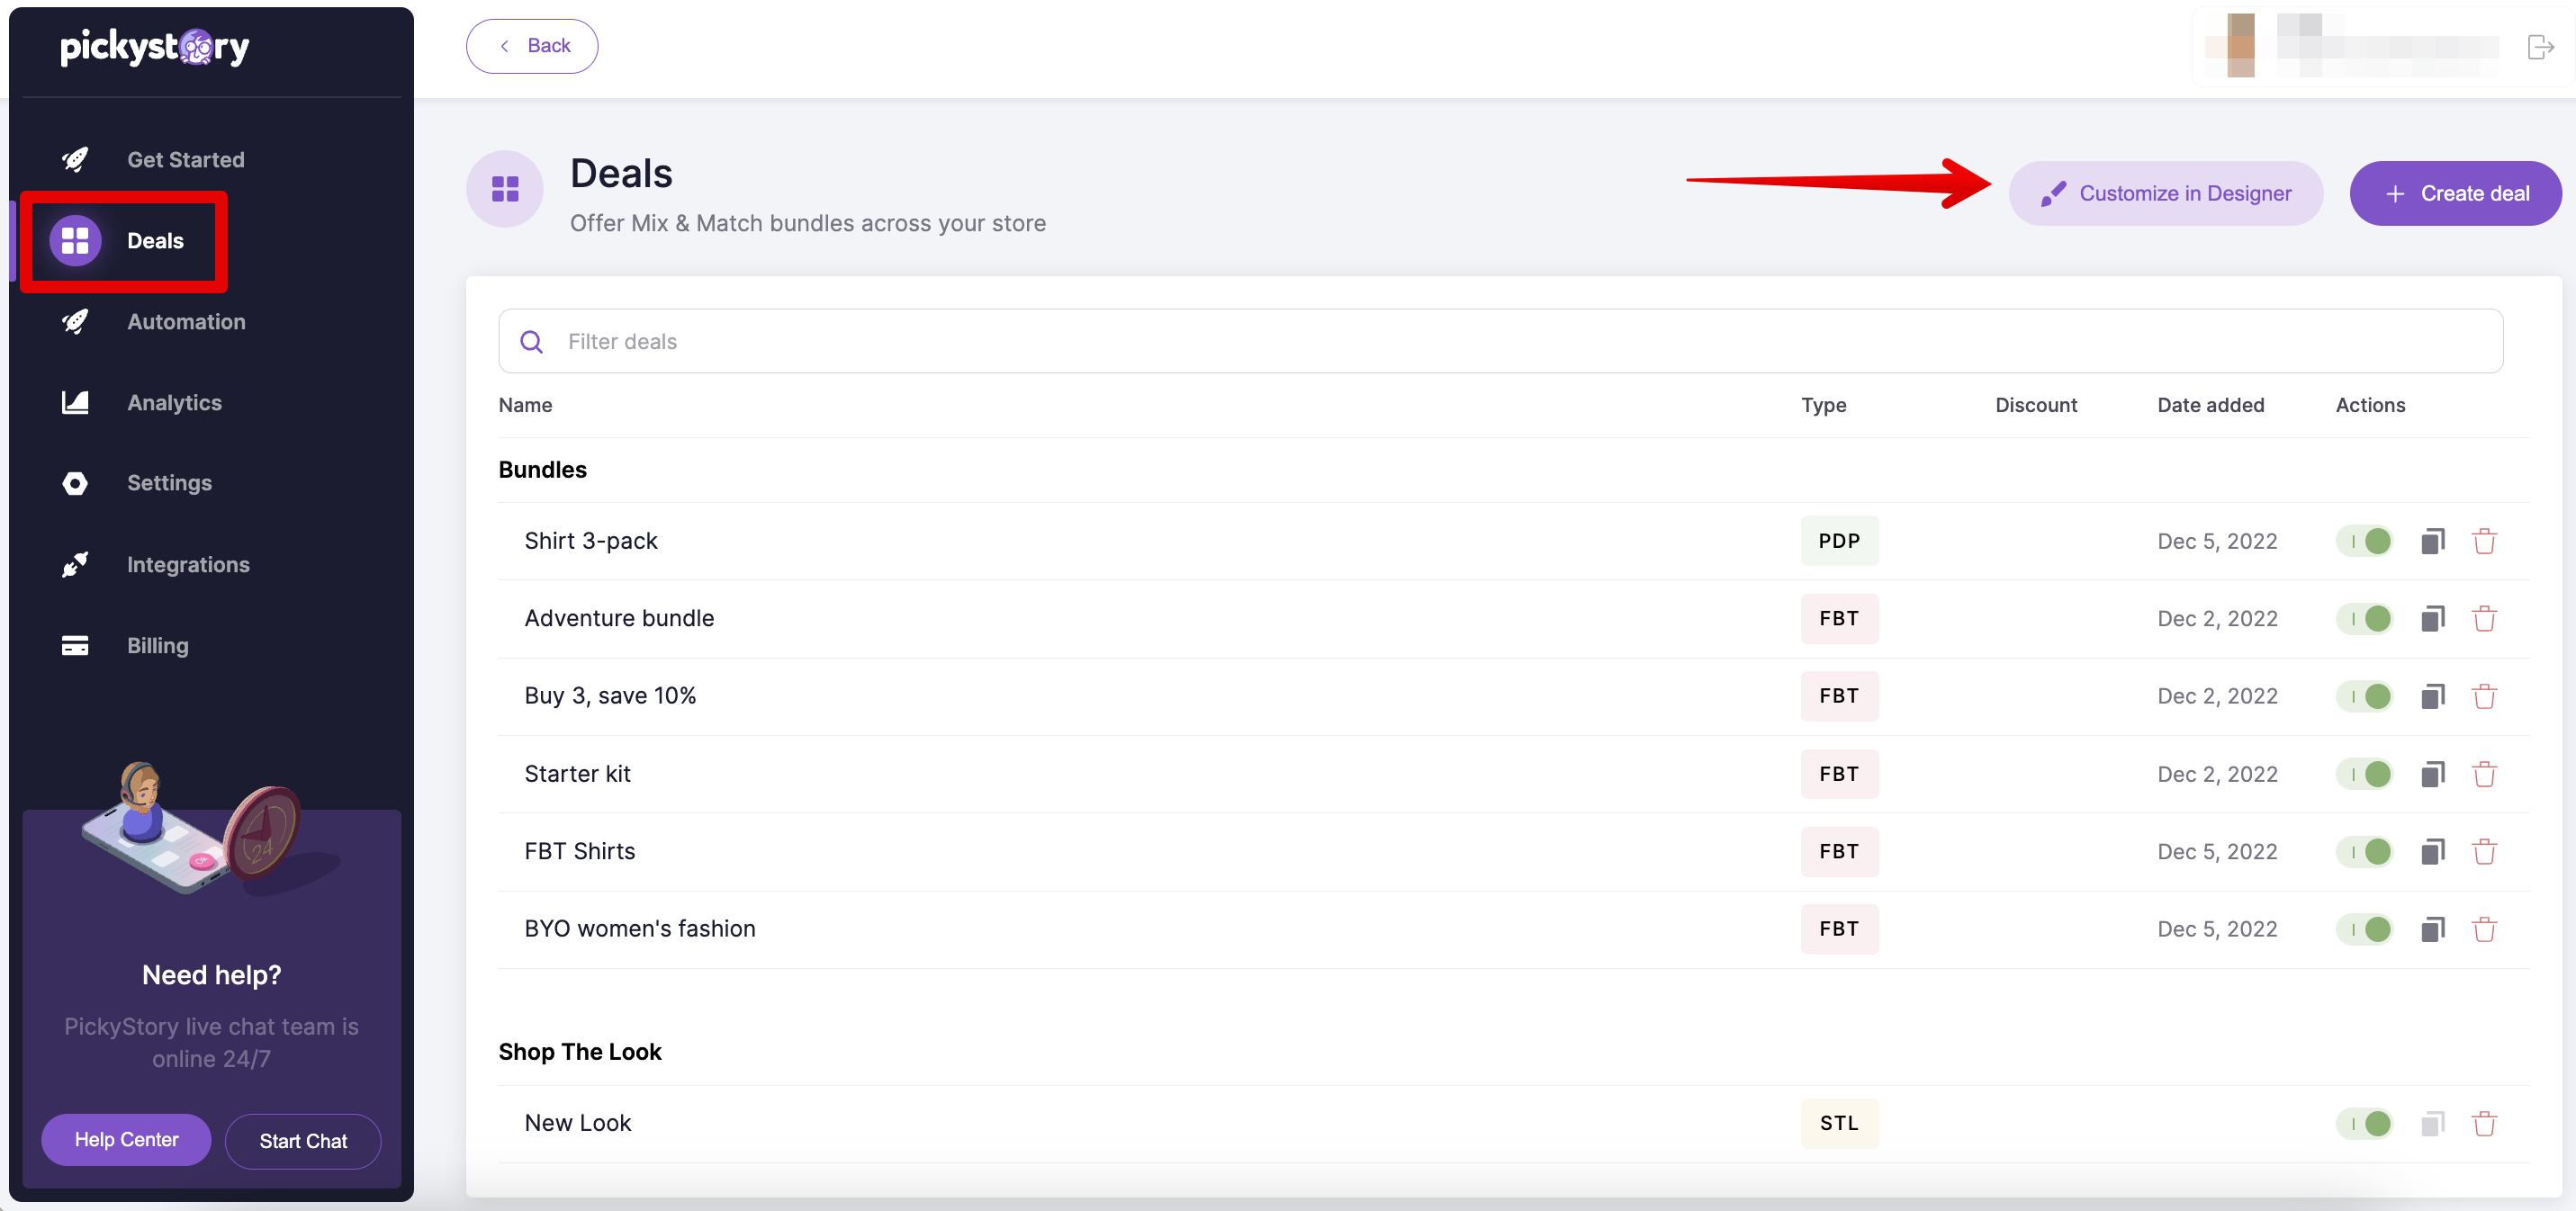
2. Navigate to the PickyStory deal designer
After locating the right selector, navigate to the PickyStory app and under the "Deals" section, click on "Customize in designer"
3. Select the appropriate location from the dropdown
Once inside the designer, choose the relevant location from the dropdown list.

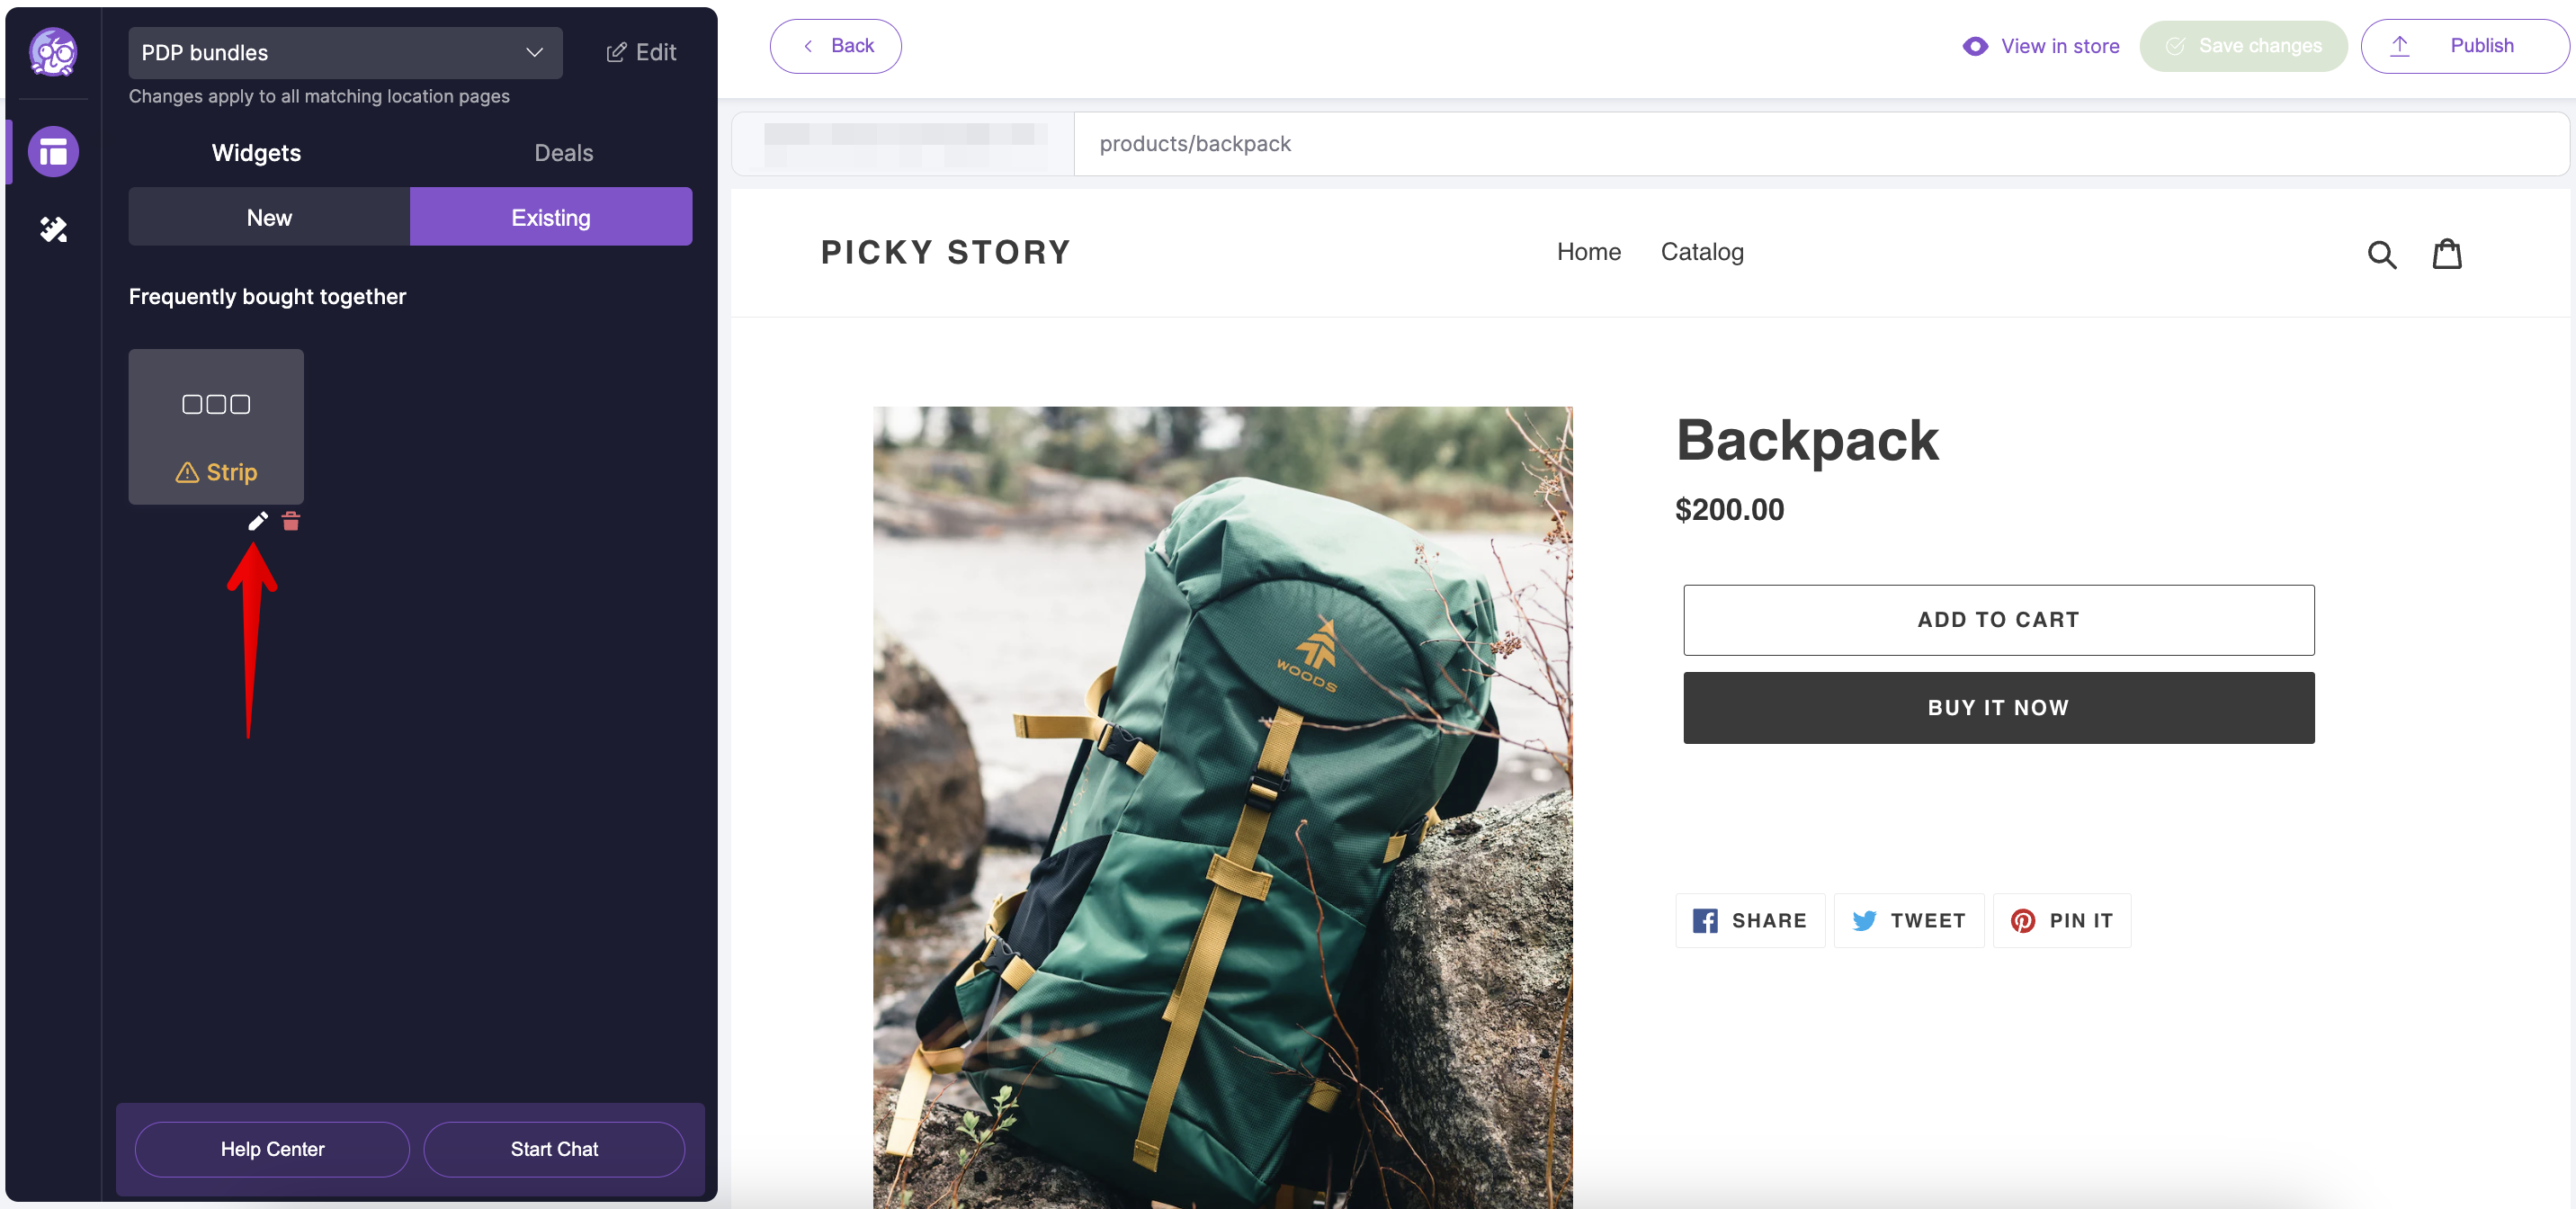
4. Open the widget editor
Once the right page is selected, click on "Existing", then click on the edit icon below "Strip" to open the widget editor
5. Enter the relevant Class/ID
Choose "Advanced", then enter the relevant Class/ID in the "Custom location selector" box.
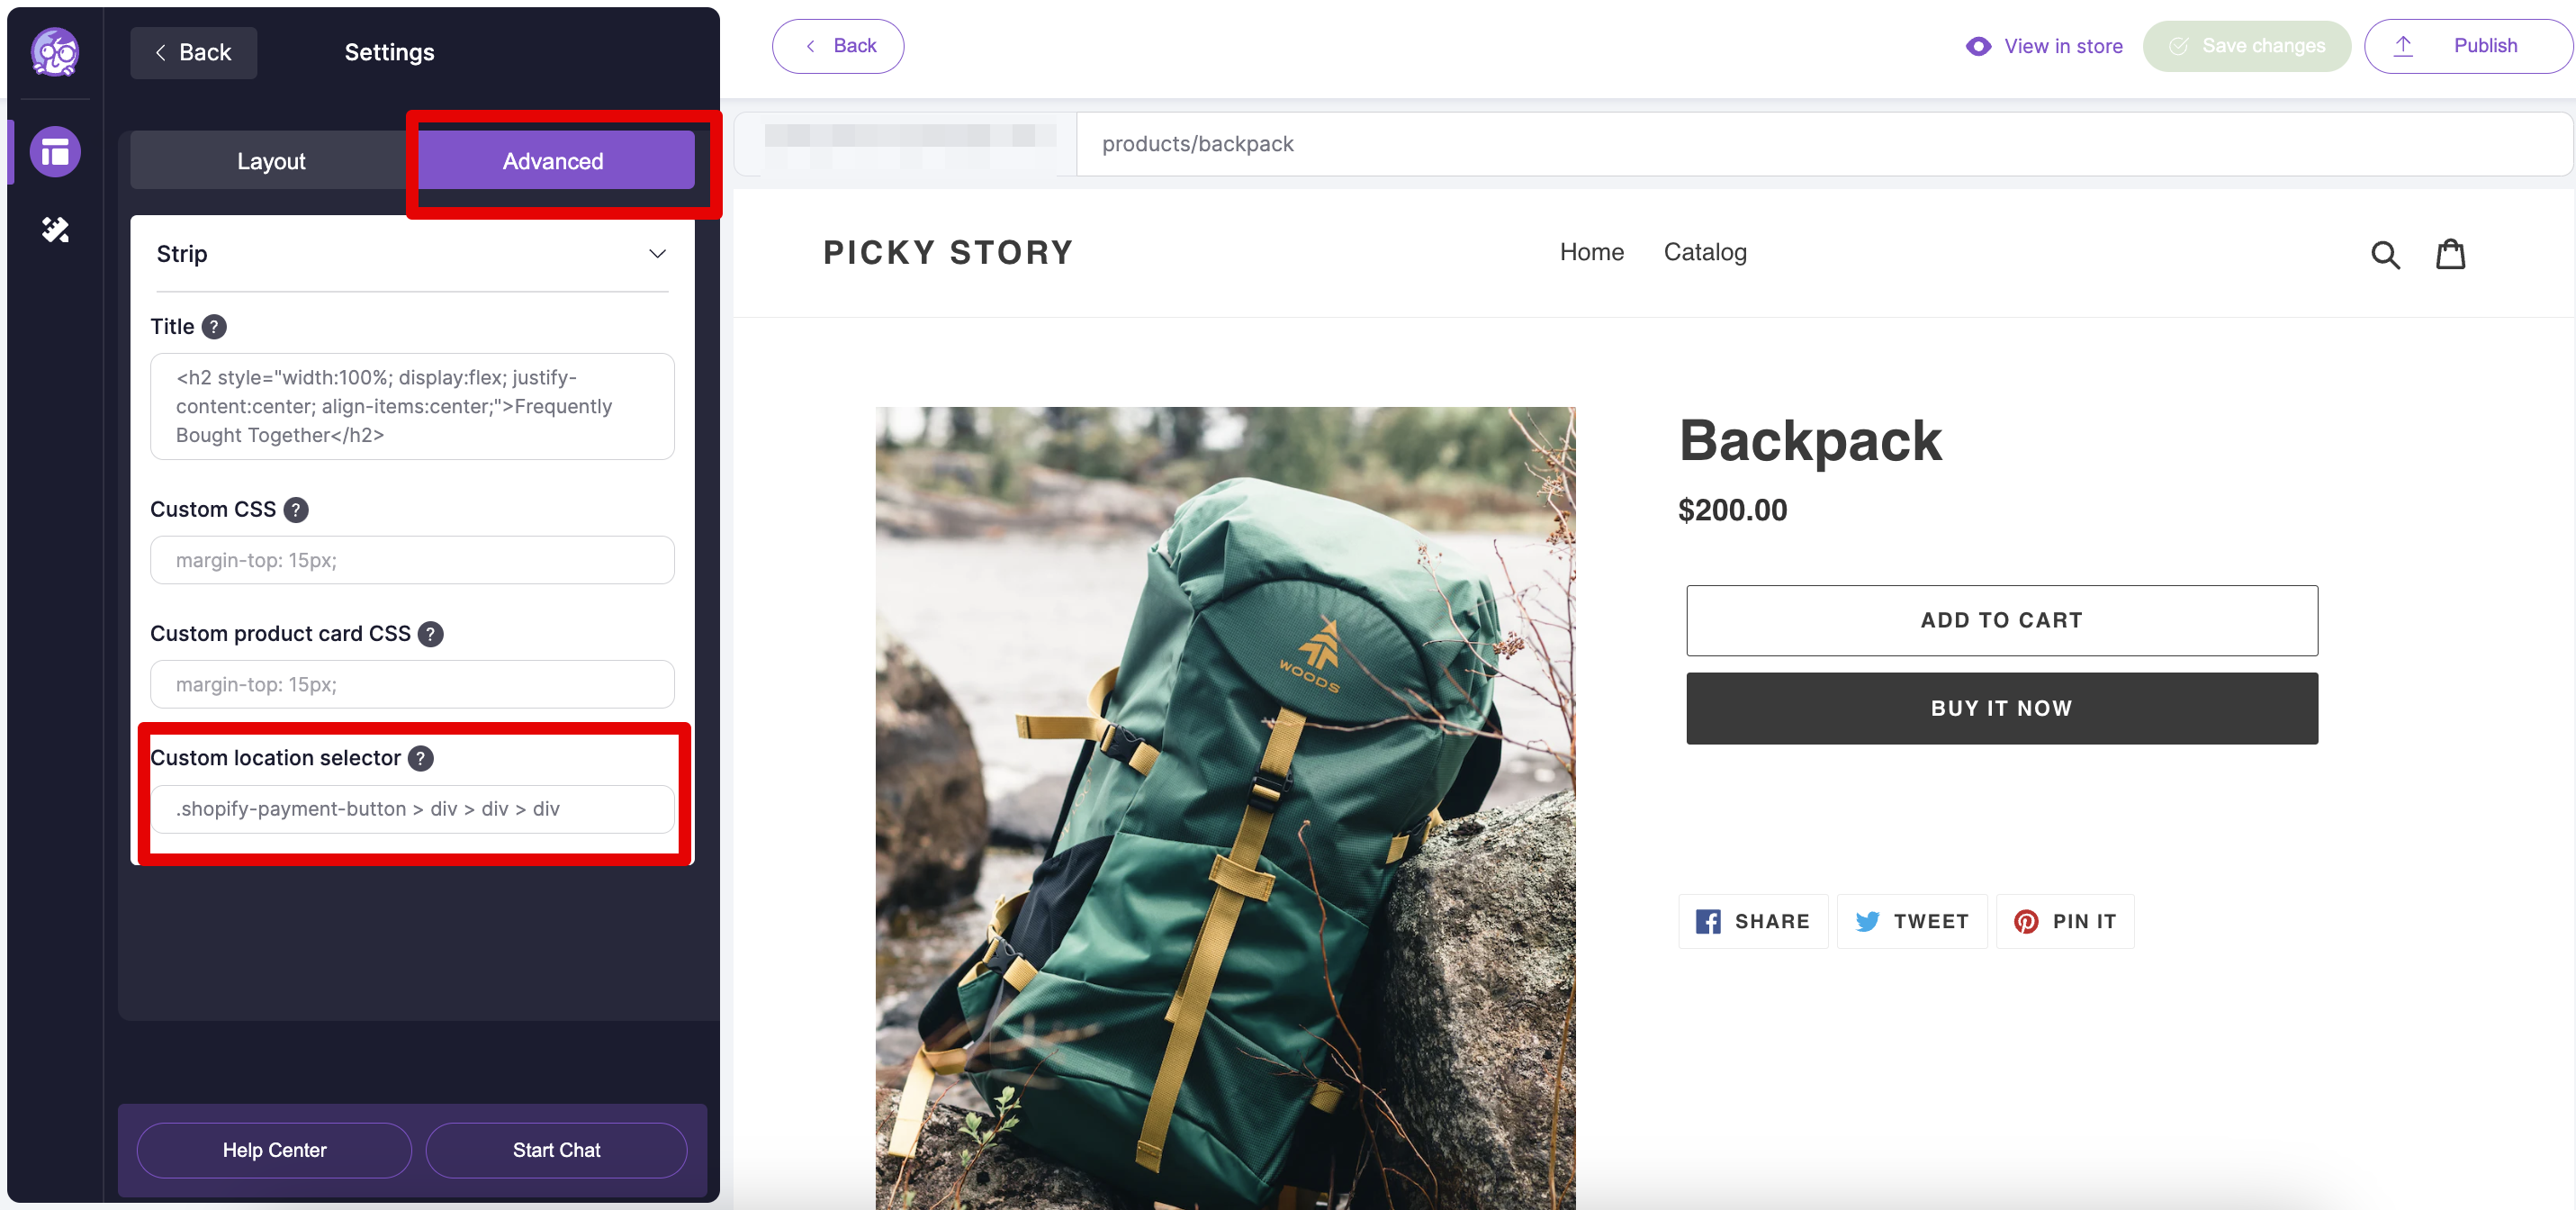
Note: When selecting 'id' as a selector, start with '#' (example: #Addtocart-bttn)
If you opt to use 'class' as the selector, start with a dot(.) and replace every space with a dot as well. (example: .add_to_cart.bttn)